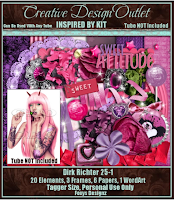
I used the wonderful art by ©Maryline Cazenave, you can get the tube and license at CDO
and I used the scrapkit ScrapFoxy_IB-DirkRichter-25-1 by Foxy Designz Scraps

Filters:
Xero / Porcelain (I add this filter to everything, you don't have to^^)
Eye Candy / Impact
Font: Kingthings Wrote
Supplies: Mask here
______________________________________________
1. Open a new raster layer 750x750
2. Open Paper6_FD / Resize to 750x750 / copy and paste as new layer
3. Apply Mask provided
4. If you use the same tube / Adjust / Hue and Saturation/ Colorize
or
or you add the background twice in both colors like I did
5. Open Frame2_FD / resize 85% / copy and paste as new layer / colorize
6. Copy and paste your tube as new layer / duplicate / move the duplicated layer below the frame
9. Copy and paste the frame layer again / move below the tube/frame layer / Image / Free Rotate / move it a bit to the right (see my tag for reference)
10. Open Element16_FD / Adjust / Brightness and Contrast / -60
12. Copy and paste as new layer / for placement look at my tag / duplicate and move this bow below the frame
13. Highlight top bow layer / Freehand selection Tool / Zoom in to have a better view / hit delete on your keyboard / once you are happy with the result, add drop shadow to bow layers and frame / merge those 3 layers
14. Copy and paste Element17_FD as new layer / placement to your liking
15. Copy and paste Element3_FD and Element18_FD (colorize) as new layer / placement to your liking / small drop shadow
16. Add copyright / name and whatever else you want to .....save as PNG
I added DSB Flux / Sparkle, but if you want to animate it , you need to add a background layer
~~~DONE~~~
This tutorial was written on 23rd of May 2019 and the copryright is mine


No comments:
Post a Comment