I used the wonderful art of ©Ismael Rac , you can get the tube at PicsForDesign
___________________________________
I used a Scrapkit of Dreaming with Bella called Thankful
and
_______________________
Fonts: An Unforunate Event and Segoe Script
_______________________
Filters:
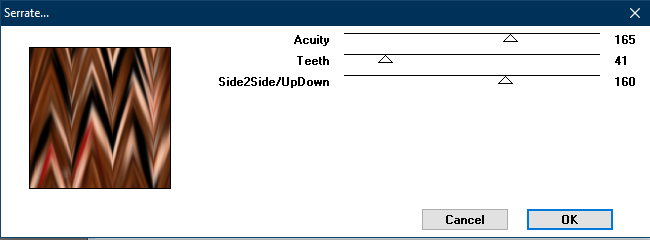
Filter Factory U / Serrate
Muras Meister / Copies (only if you don't have an image)
L en K filters / Zitah and Pia
Filter Factory U / Serrate
Muras Meister / Copies (only if you don't have an image)
L en K filters / Zitah and Pia
::::::::::::::::::::::::::::::::::::::::::::::::::::::::::::::::::::::::::::::::::::
I am going to explane how I did the background animation, rest is up to you ;)
Have fun !!!
1.) Open a new raster layer 600x250 pixel
2.) If you don't have an image of your tube, then copy and paste your tube (Muras Meister/ Copies / Wallpaper rotate / default settings) otherwise copy and paste your image as newraster layer, move to the right / duplicate and mirrow / merge down
3.) Adjust / Blur / Gaussian Blur / Radius 10
4.) Effects / Filter Factory U / Serrate
5.) Effects / Edge Effects / Enhace
6.) Effects / L en K / Zitah
7.) Duplicate / Effects / L en K Pia / LK1 / 85
8.) Magic Wand Tool / Tolerance 10 / select all black squares / hit the "DELETE" button on your keyboard / select none
9.) Effects / Edge effects / Erode
10.) Effects / Texture Effects / Weave
11.) Effects / 3D Effects / Drops Shadow (3 / -3 / 50 / 7)
12.) Take yourRectangle Tool / foreground none / background a gradient of your choice
13.) Effects / Distortion Effects / Wave
14.) Duplicate / image mirror / duplicate / image flip / for placement look at my example
15.) Move this layer between the background and square layer / rotate and add drop shadow
16.) Copy and paste your tube / move to the right / drop shadow
17.) Text Tool / foreground none / background white / An Unfortunate Event / size up to you / write your name / convert to raster layer / drop shadow and set the layer mode to soft light
18.) Select all / modify / contract by 2 pixels / invert / highlight your top layer / add a new raster layer and fill with a color of your choice / deselect
20.) Add drop shadow (1 / 1 / 50 / 5 ) , repeat with -1 / -1
______________________________
Animation
I animated those 3 stripes with the Underwater Effect from Animation Shop
~~~DONE~~~
This tutorial was written on 29th of august 2019 and the copyright is mine


No comments:
Post a Comment